A well-insulated home is key to energy efficiency and cost savings. However, professional insulation upgrades can be expensive. Fortunately, you can achieve significant improvements through DIY house insulation without breaking the bank. By sealing gaps around doors and windows, you can keep warm air in during the winter and cool air in during the summer.
This guide covers affordable insulation techniques, materials you can use, and step-by-step instructions to help you enhance your home’s energy efficiency while saving money.
Why DIY House Insulation Matters for Energy Savings
Good insulation improves your home’s energy efficiency, making it more comfortable and reducing heating and cooling costs. Here are some benefits of proper insulation:
- Energy Savings: Proper insulation can lower energy bills by up to 20-30%.
- Comfort: Eliminates drafts and maintains a consistent indoor temperature.
- Eco-Friendly: Reduces your carbon footprint by lowering energy consumption.
- Prevents Moisture Issues: Sealing gaps helps prevent mold and mildew growth.
Understanding Insulation: Types and Benefits
Before starting your DIY insulation project, it’s essential to understand the different types of insulation available.
Types of Insulation
| Type | Material | Best For | R-Value (Per Inch) |
|---|---|---|---|
| Fiberglass Batt | Glass fibers | Walls, attics, floors | R-3.0 to R-4.0 |
| Spray Foam | Polyurethane | Walls, attics, crawl spaces | R-5.5 to R-7.0 |
| Cellulose | Recycled paper | Walls, attics | R-3.2 to R-3.8 |
| Rigid Foam Board | Polystyrene | Basement walls, roofs | R-4.0 to R-6.5 |
| Reflective Foil | Aluminum sheets | Attics, roofs | Varies |
R-Value: What It Means
The R-value measures an insulation material’s ability to resist heat flow. A higher R-value means better insulation. The recommended R-value depends on your climate zone:
- Cold Climates: R-49 to R-60 in attics
- Moderate Climates: R-38 to R-49 in attics
- Warm Climates: R-30 to R-38 in attics
DIY Insulation Techniques for Different Parts of Your Home
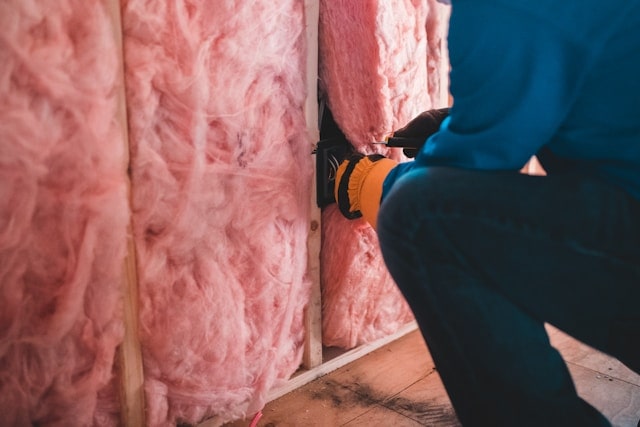
1. Attic Insulation
Attics are one of the most important areas to insulate since heat rises and escapes through the roof.
Best Materials:
- Fiberglass batts
- Blown-in cellulose
- Spray foam
DIY Steps:
- Seal Air Leaks – Use caulk or spray foam to seal cracks and gaps around vents, pipes, and electrical openings.
- Lay Fiberglass Batts or Blown-in Insulation – Place batts between joists or use a blower machine for loose-fill insulation.
- Add a Vapor Barrier – If needed, install a vapor barrier to prevent moisture buildup.
2. Wall Insulation
Walls account for up to 35% of heat loss in a home. Insulating walls can dramatically improve energy efficiency.
Best Materials:
- Fiberglass batts
- Spray foam
- Rigid foam board
DIY Steps:
- Drill Small Holes – If adding insulation to existing walls, drill small holes between studs.
- Insert Spray Foam or Blown-in Insulation – Use an insulation blower or spray foam gun.
- Patch and Paint – Seal holes and repaint walls as needed.
3. Floor and Crawl Space Insulation
Uninsulated floors and crawl spaces can make a home feel cold and drafty.
Best Materials:
- Fiberglass batts
- Rigid foam boards
DIY Steps:
- Install Batts or Foam Board Between Joists
- Seal Gaps with Spray Foam
- Cover with Plywood for Protection
4. Window and Door Insulation
Windows and doors are common sources of air leaks.
DIY Solutions:
- Weatherstripping – Apply adhesive strips around doors and windows.
- Caulking – Seal cracks and gaps with caulk.
- Thermal Curtains – Use heavy curtains to retain heat in winter.
Cost Breakdown of DIY vs. Professional Insulation
DIY insulation is significantly cheaper than hiring professionals.
| Area | DIY Cost | Professional Cost |
|---|---|---|
| Attic | $500 – $1,500 | $2,500 – $5,000 |
| Walls | $800 – $2,000 | $3,000 – $6,000 |
| Crawl Space | $300 – $1,000 | $1,500 – $4,000 |
| Total Savings | Up to 70% |
Common Mistakes to Avoid in DIY Insulation
Even the best materials won’t work if installed incorrectly. Here are common mistakes to avoid:
- Ignoring Air Leaks – Seal gaps before installing insulation.
- Over-Compressing Fiberglass Batts – This reduces their effectiveness.
- Not Wearing Protective Gear – Fiberglass and spray foam can cause skin and respiratory irritation.
- Blocking Ventilation – Always leave space for airflow to prevent moisture buildup.
Affordable DIY House Insulation Techniques That Work
1. DIY House Insulation with Weatherstripping
One of the easiest and most cost-effective ways to seal air leaks is using weatherstripping. This material comes in foam, rubber, or vinyl and is placed around door and window frames to prevent drafts.
How to Apply Weatherstripping:
- Measure the perimeter of the door or window.
- Clean the surface where the strip will be applied.
- Peel off the backing and press the weatherstripping firmly into place.
- Check for gaps and make adjustments as needed.
Best Weatherstripping Materials:
| Type | Best For | Cost Range |
|---|---|---|
| Foam Tape | Windows & Doors | $5-$15 |
| V-strip | Windows & Sliding Doors | $10-$25 |
| Rubber Seal | Exterior Doors | $15-$30 |
2. How Caulking Helps in DIY House Insulation
Caulk is an inexpensive sealant that fills small cracks and gaps around windows, doors, and baseboards.
How to Apply Caulk:
- Choose a caulk suitable for your home’s needs (silicone for flexibility, acrylic latex for easy painting).
- Clean the area to remove dust and debris.
- Cut the tip of the caulk tube at a 45-degree angle.
- Apply the caulk in a continuous bead along the gap.
- Smooth it out with a damp finger or a caulking tool.
3. DIY Draft Stoppers for Doors
Draft stoppers (also called door snakes) are simple fabric tubes filled with insulation material that block air from seeping under doors.
DIY Draft Stopper Instructions:
- Cut a fabric strip (old towels or socks work well) about 36 inches long.
- Fill it with rice, sand, or foam tubing.
- Sew or glue the edges shut.
- Place it at the bottom of the door to stop drafts.
4. Insulating Window Film
Window insulation film is an affordable and effective way to keep heat from escaping through windows.
How to Install Window Film:
- Clean the window thoroughly.
- Cut the film to fit the window dimensions.
- Apply the double-sided tape along the window frame.
- Press the film onto the tape and use a hairdryer to shrink it tightly.
5. Foam and Rubber Door Seals
For doors that let in drafts, foam and rubber seals provide an effective solution.
How to Install Foam Door Seals:
- Clean the doorframe to ensure proper adhesion.
- Measure and cut the foam seal to size.
- Peel off the adhesive backing and attach the seal along the frame.
- Test the door to make sure it closes properly.
6. Reflective Window Covers
Aluminum foil or reflective window covers can help reflect heat back into the home, especially during winter.
How to Use Reflective Covers:
- Measure your window and cut the reflective material accordingly.
- Tape or use suction cups to secure it against the glass.
- Remove during the day to let in sunlight.
7. DIY House Insulation with Heavy Curtains and Drapes
Thick curtains help trap heat inside during winter and block out sunlight in summer.
Tips for Choosing Curtains:
- Opt for thermal or blackout curtains for best insulation.
- Make sure they extend past the window frame for maximum coverage.
- Consider adding curtain liners for extra insulation.
8. Insulating Electrical Outlets and Switches
Cold air can enter through electrical outlets on exterior walls. Foam outlet insulators are an easy fix.
How to Insulate Outlets:
- Turn off the power to the outlets.
- Remove the outlet cover with a screwdriver.
- Place the foam insulator over the outlet and reattach the cover.
9. Insulating Baseboards and Floor Gaps
Gaps between floors and baseboards allow heat loss. Use foam tape or caulk to seal these spaces.
Steps to Seal Baseboard Gaps:
- Clean the area thoroughly.
- Apply a thin bead of caulk or insert foam sealant.
- Smooth the seal with a damp cloth.
10. DIY Plastic Bottle Insulation
Repurpose plastic bottles by cutting them open and stuffing them with shredded fabric or foam to create makeshift insulation.
How to Use Plastic Bottles for Insulation:
- Cut bottles open lengthwise.
- Fill with shredded fabric or recycled foam.
- Tape or stack them in drafty areas, such as attics or basements.
FAQs
How can I tell if my doors and windows need insulation?
If you feel drafts, notice rising energy bills, or see light coming through gaps, you likely need insulation.
Is DIY insulation as effective as professional insulation?
While professional insulation is more comprehensive, DIY methods significantly reduce drafts and improve comfort.
What is the cheapest way to insulate a house?
Weatherstripping, caulking, and draft stoppers are among the most affordable insulation methods.
Can I insulate windows without replacing them?
Yes! Use window film, heavy curtains, or reflective covers to enhance insulation without replacing windows.
How often should I check my insulation?
Inspect doors and windows seasonally to ensure seals are intact and effective.
Does insulation help with noise reduction?
Yes! Many DIY insulation methods, like heavy curtains and foam seals, also reduce outside noise.
Conclusion
Improving your home’s insulation doesn’t have to be costly or complicated. With these affordable DIY house insulation techniques, you can seal doors and windows, reduce energy bills, and enhance comfort without hiring a professional. Whether using weatherstripping, caulking, or draft stoppers, small changes can make a big difference.
Start your DIY insulation project today and enjoy a warmer, more energy-efficient home!
For more energy-saving insulation tips, visit the U.S. Department of Energy’s Insulation Guide.